Page 2 of 4

Re: One Tough Pony - '69 Bronco Build

Posted: Nov Mon 16, 2009 10:56 pm
by DynoJetta
Finished pulling the heads off of both engines.

Image Image

Next the explorer heads are going to a local machine shop (M&W in Three Forks) to get cleaned and magnafluxed. If nothing is wrong with them, most likely the only thing I will do with them is a valve job and some roller rockers.

ehhh.... going to have to start selling some parts to get some more build funds coming in. If anyone's interested in Ford 5.0L stuff let me know (explorer short block, bronco heads and intake, explorer and mustang upper intake, etc.)

Re: One Tough Pony - '69 Bronco Build

Posted: Nov Mon 16, 2009 11:52 pm
by Checkers
I might want the Mustang heads. You're using the GT40's, right?

Re: One Tough Pony - '69 Bronco Build

Posted: Nov Tue 17, 2009 8:07 am
by DynoJetta
I'm using the explorer's GT40P heads. So the only heads I have available to sell will be the heads I pulled off of the Bronco engine. Part # F1AZ6049AARM (without valves) part # E8TZ6049ARM with valves.

The only mustang part that I have is a mustang upper intake manifold that I picked up before I decided to go with the GT40 intake setup. (sorry :confused: ) I'm going to work on a detailed list of everything I want to sell (with pictures). I'll let you know when I get it done.

Re: One Tough Pony - '69 Bronco Build

Posted: Dec Mon 07, 2009 9:32 pm
by DynoJetta
Alright, progress report on this.

11/20 - No progress made on the bronco, but did some cleaning and organizing. I'm working in my Dad's shop, sharing space with the work equipment and my brother's Race Truck. For the longest time there have been two tool boxes, 1 stuffed with tools, the other stuffed with crap. So I cleared enough crap out of the one to better distribute the tools between the two.

11/27 In-laws were in town for Thanksgiving. Took some time off, did a little hunting (skunked though)

12/04 - Did some more work on the bronco. Went ahead and took the top off (by myself with a large cherry picker... fun). Also removed the doors. Broke one of the six bolts on the passenger side :fedup:. There were only 4 bolts present on the driver's side (two top, two bottom) because PO had already broken off two of them. I went ahead and broke off 3 of the remaining 4. :fedup: Gonna have some fun when it comes time to address that issue.


Image

I went ahead and dropped the windshield frame down to inspect and..... surprisingly it's in pretty good shape. A little dirt and some surface rust, but nothing bad. The windshield frame had been replaced once by the PO due to the before mentioned rollover. When they replaced it, they pop-riveted it in place, rather than spot welding it. So if I ever decide to get the stainless windshield frame, it should be an easy job (which would be nice since I'm 6' 4" and could use the extra visibility).

I spent the rest of the night cleaning up a spot in the back of the shop to where I can store my top out of the way.

I'll get some pictures of the windshield area posted up as soon as I get them uploaded.

Re: One Tough Pony - '69 Bronco Build

Posted: Feb Fri 26, 2010 11:13 am
by DynoJetta
Been awhile since I've given an update on this. So here's a big one:

12/11
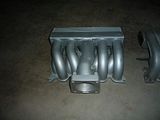
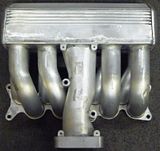
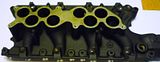
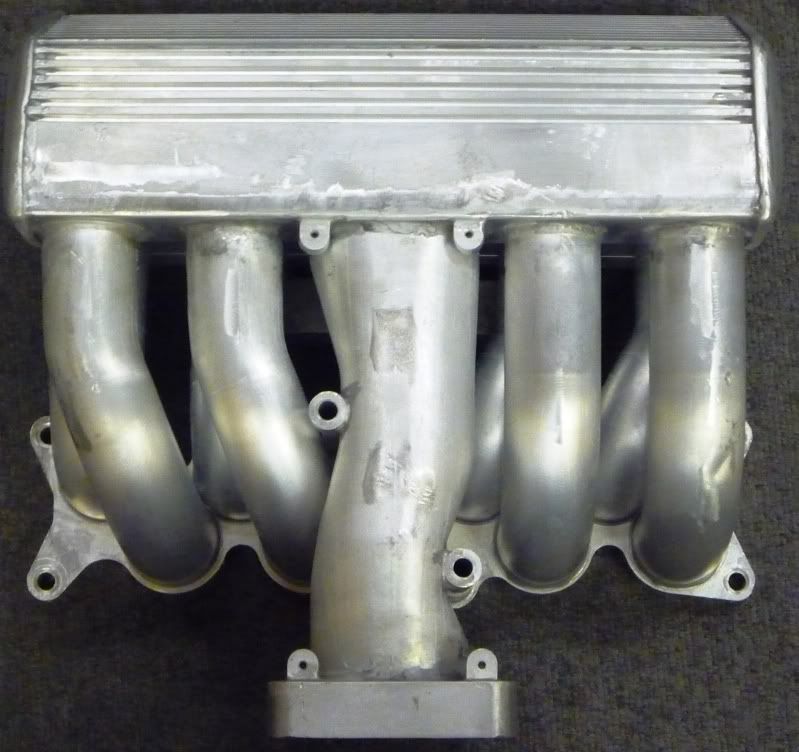
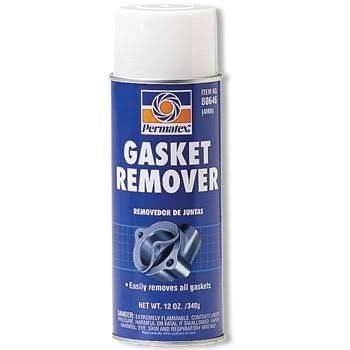
The GT40 upper intake that I acquired was previously powder coated silver. Since then it has been dinged and scratched up. So I took it in to see how much it would cost to get re-PC’d. The guy told me it would cost a couple hundred buck mainly due to how hard it was going to be to get the old PC off (getting in and around the tubing). I thought it was a pretty BS reason for the high price so I didn’t drop it off.

Started doing a little research and came across a custom bike builder who said that you can spray Permatex Gasket Remover on it and then wipe it right off with a rag. I was pretty skeptical, but never-the-less I went to Napa and picked up a can for $5.99. Would you believe it worked just like he said?!? PC is some pretty durable stuff, but this stuff instantly started making it bubble up off of the metal. And sure enough, I could pretty much wipe it off with a rag.

A couple sessions of spraying and pressure washing and I was able to get all of the PC off!

Before                              After
Image Image

12/19
With the help of my wife’s cousin, I went through and disassembled and cleaned up a bunch of parts. Scrubbed the bronco heads down, pulled everything off of the Explorer and Bronco intakes, and scrubbed the lowers.
There’s still quite a bit that could be cleaned, but things have been busy.

12/22
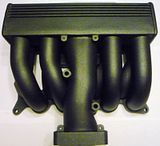
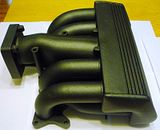
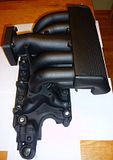
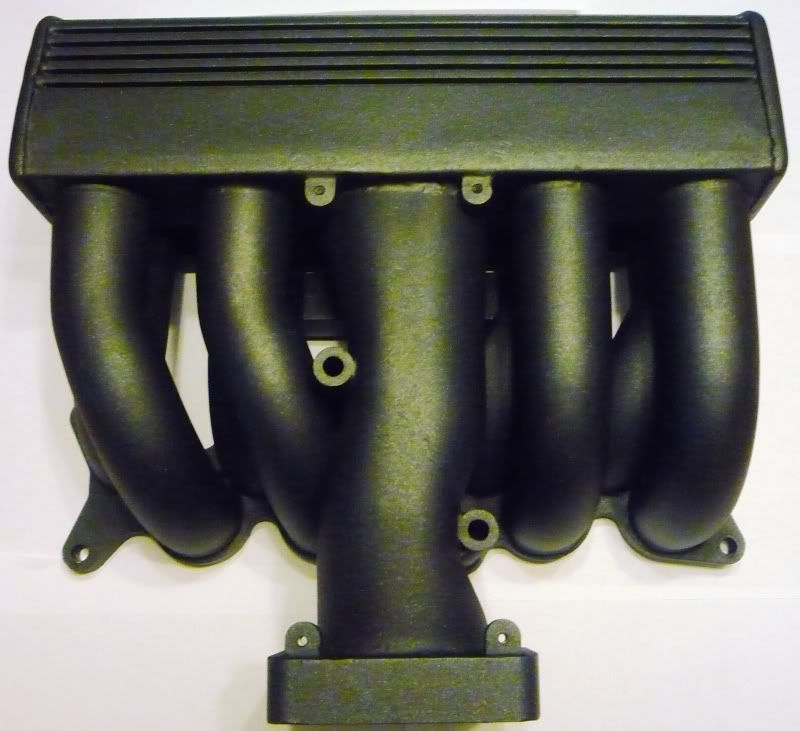
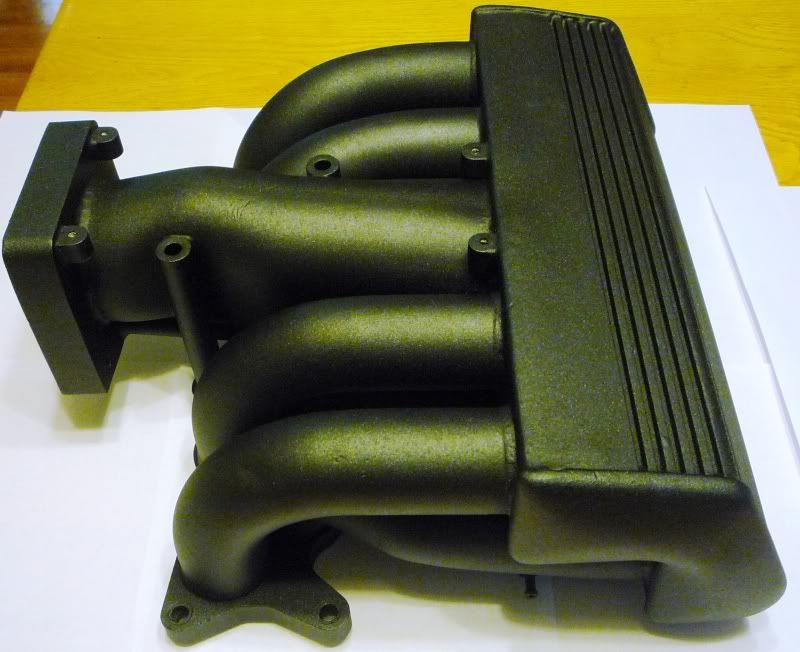
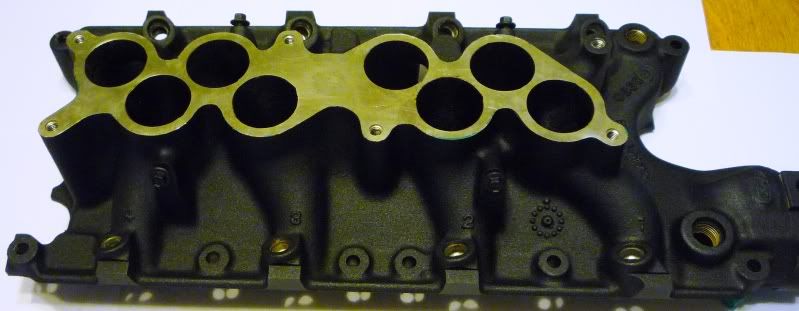
I dropped off the GT40 Upper, the explorer lower, and thermostat housing off at the powder coaters. A little ahead of the game, but I figured it would nice to get some stuff done while I’m waiting for some more build funds to come in (I have a balance I can use at the PC place, so nothing out of pocket).

1/25/2010
Things have been going slow on this. With the holidays, going out of town on vacation, and a bout of food poisoning…. things haven’t progressed like I’ve wanted to. But nothing that is not new to the process of building something up.

I picked up my intakes from the powder coater. They turned out really nice (pictures don’t do it justice).

Image Image Image Image

1/29
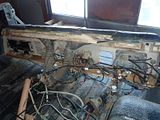
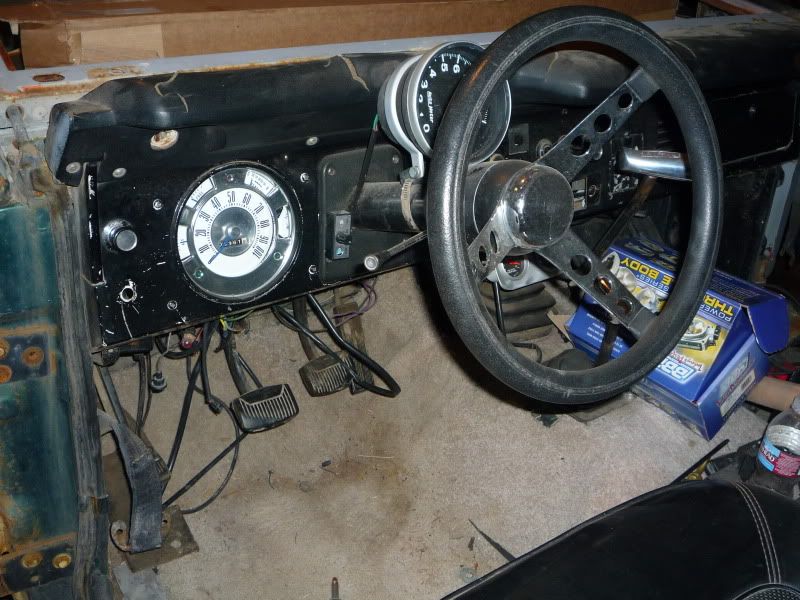
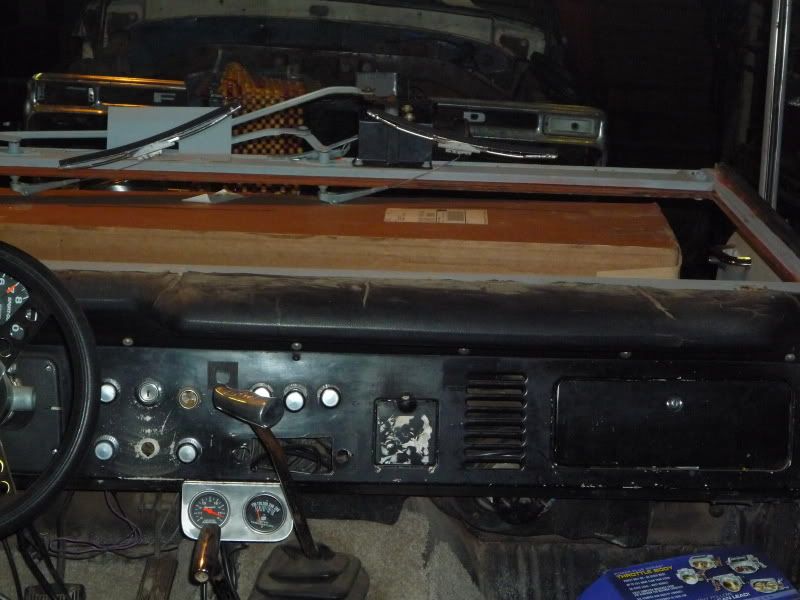
So here’s a couple pictures of my original dash. Since I will be replacing it entirely, these will show a good “before” state.

Image Image


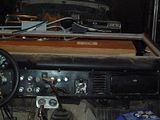
This last Friday I removed the steering column and pulled the dash out in its entirety.

Image Image Image

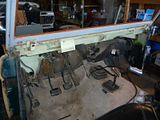
Talk about a rat’s nest of wires.
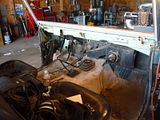
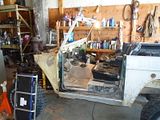
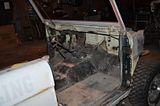
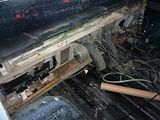
Image Image


2/12

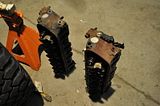
Finished getting everything stripped out of the bronco.

Image Image

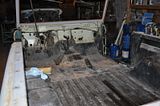
I pulled up the carpet to find the spray in bedliner flaking up and rust underneath. You can see in the picture that the “patch” job done before spraying in the bedliner didn’t take care of the underside.

Image Image


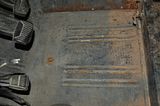
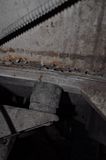
So the bedliner will be completely removed and I’ll have to remove and replace some sheetmetel.

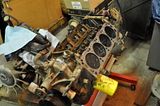
Also, I picked up my heads from the machine shop. Boy do they look nice!

Before                                After

Image Image

Image Image Image

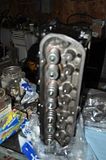
They were disassembled, cleaned and magnafluxed. The valves and seats were ground. Stem heights were re-adjusted, and then the faces were surfaced because the machine shop said they were “marginal”. Also, new frost plugs, spring shims, seals and keepers were installed.

I was able to sell the other set of heads I had, so it was nice to offset the machine shop cost with that money. Now if only I could get rid of some more of my extra parts...

2/26
Starting on my rotisserie today. I have all the materials, just have to do the cutting, drilling, and welding. I’m going to go with the design that was posted on classicbroncos.com (Bronco Rotisserie).
Since I do CAD for a living, I went ahead and drew it up in SolidWorks so I could print out some nice drawings to work with.

Image
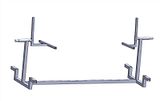
It'll have casters on it so I can roll it around the shop.

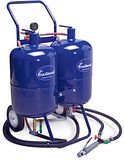
Once I get my tub bracing in, I’m going to pull the tub and start blasting.
Ordered a media blaster from www.eastwood.com. Tax Returns FTW!!

Image

Re: One Tough Pony - '69 Bronco Build

Posted: Feb Fri 26, 2010 11:48 am
by Mikewire
Wow, nice work Josh.

I can't believe all the project threads...I think we need to make a new category just for the project threads.

Re: One Tough Pony - '69 Bronco Build

Posted: Feb Fri 26, 2010 3:34 pm
by DynoJetta
MikeWire wrote:Wow, nice work Josh.

I can't believe all the project threads...I think we need to make a new category just for the project threads.

I agree. Maybe two separate ones: one for VW/Audi builds, the other for Non-VW/Audi builds. :thumbsup:

Re: One Tough Pony - '69 Bronco Build

Posted: Feb Sat 27, 2010 12:33 pm
by DynoJetta
Last night I went through and welded in my bracing. I finished most of it (ran out of welding rod). I haven't decided if I'm happy with all that I have in, or if I'll add any more. (see Tub Bracing Post on broncofix.com). I did two on each door (top and bottom). Tied in a diagonal between the tops and bottoms. Then three cross tubs (windshield, rear door post, and back by the tailgate.)

Image Image Image


I'm definitely pretty rusty on welding (nice bird poo welds!). I should get some pretty good practice welding the rotisserie together. I started cutting and drilling the material for it yesterday. I hope to have it all together and ready to use by next Friday. :)

Re: One Tough Pony - '69 Bronco Build

Posted: Apr Tue 06, 2010 12:09 pm
by DynoJetta
Here’s a pic of the rotisserie all finished up.

Image

Pictures of pulling the tub. I didn’t have enough room to get the forklift next to it, so I pulled it off with a Cherry Picker and then set it on the forklift. Tested all my bracing welding during this process.

Image Image Image Image Image Image

And finally here it is on the rotisserie.

Image Image Image

Made it interesting doing this all by myself, but still managed to get it done without hurting myself.

Nice dirty frame and drive train:
Image

Been doing a lot of re-arranging and cleaning in the shop to get to this point. Can't wait to start blasting!

Re: One Tough Pony - '69 Bronco Build

Posted: Apr Mon 12, 2010 10:08 am
by DynoJetta
Sigh.... slow but sure progress this weekend.

Worked on getting some additional lighting wired up. Started getting the blast booth setup also. Still have a bit to do to finish it up though.

(sorry about the crappy cell phone pics, didn't have my camera with me)

Image Image Image Image