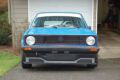
VR6 Caddy Build
Moderators: Mikewire, Rennwagen1
-
Unimoger
- Back seat driver...

- Posts: 188
- Joined: Jun Sat 02, 2007 12:54 pm
- Vehicles: 92 GTI VR, 87 QSW, 03 A4 Q, 13' golf R
- Location: Bend, OR.
- Contact:
that is some great progress  I really want to come down and see it in person along with all the other awesome bozeman builds!
It's not what's on the outside, it's what's under the hood.....................
http://www.thehobbygarageonline.com
http://www.facebook.com/thehobbygarage
http://www.thehobbygarageonline.com
http://www.facebook.com/thehobbygarage

-
BigSkyVR6Caddy
- In the engine bay...

- Posts: 105
- Joined: Nov Thu 01, 2007 7:32 pm
- Location: Bozeman, MT
Re: VR6 Caddy Build
VR6 Subframe Mounts:
Removed the subframe mounts from the Jetta GLX this weekend.
I just removed all the mounting points with a grinder & cutting wheel so I can be done with the Jetta for the winter.
Do not know if I will use all these mounts, but at least I have everything removed and inside if needed.
The three mounts runnining down each side were removed in one piece.
I will probably cut-off the two front mounts and locate these points first on the caddy frame to establish center, alignment and motor height.
Then with the four rearward mounts bolted to the subframe, I can weld them to the Caddy and establish front motor mount height.
I will add some pictures later.
Updated:
Subframe mounts removed from the GLX
Mounts shown cut-out and sitting on and next to the subframe.
There are three mounting points on each side.
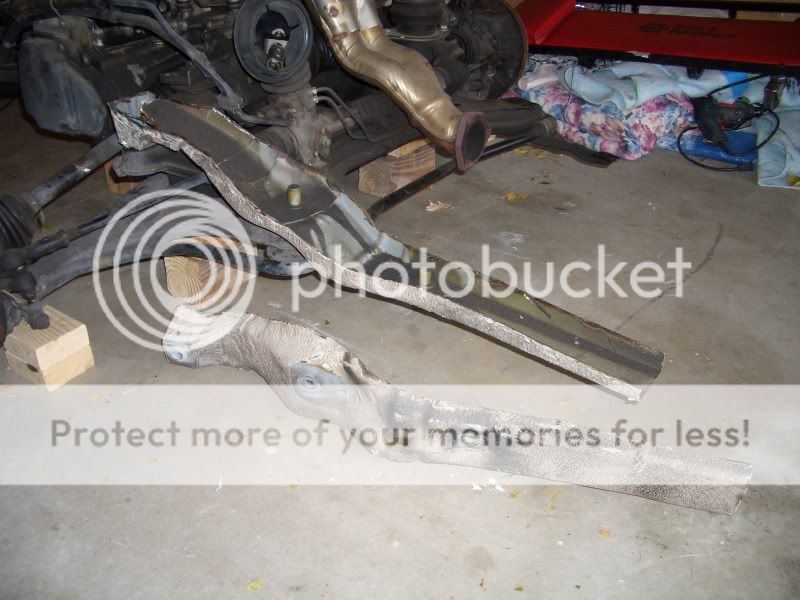
Next, I will focus on cutting and grinding on the Caddy while it is outside.
The purpose of this will be to remove metal that is in the way or not needed and most important are the critical cuts that will support the front mounting points.
I will also remove metal for the steering rack and down pipe to clear.
Then I can think about bringing the Caddy inside and setting it on the subframe.
Removed the subframe mounts from the Jetta GLX this weekend.
I just removed all the mounting points with a grinder & cutting wheel so I can be done with the Jetta for the winter.
Do not know if I will use all these mounts, but at least I have everything removed and inside if needed.
The three mounts runnining down each side were removed in one piece.
I will probably cut-off the two front mounts and locate these points first on the caddy frame to establish center, alignment and motor height.
Then with the four rearward mounts bolted to the subframe, I can weld them to the Caddy and establish front motor mount height.
I will add some pictures later.
Updated:
Subframe mounts removed from the GLX
Mounts shown cut-out and sitting on and next to the subframe.
There are three mounting points on each side.
Next, I will focus on cutting and grinding on the Caddy while it is outside.
The purpose of this will be to remove metal that is in the way or not needed and most important are the critical cuts that will support the front mounting points.
I will also remove metal for the steering rack and down pipe to clear.
Then I can think about bringing the Caddy inside and setting it on the subframe.
Last edited by BigSkyVR6Caddy on Nov Sat 08, 2008 11:02 am, edited 1 time in total.
1981 Rabbit Pick-up MKIII VR6
-
sneakyboy1

- Euro Addict!!!

- Posts: 2344
- Joined: Jan Wed 09, 2008 1:30 am
- Vehicles: 03 B6 A4 3.0 6MT
63 VW Bug
83 GTI
83 CJ7 - Location: Missoula, MT
- Contact:
Re: VR6 Caddy Build
Thanks for the update!!!
I soooo cannot wait to see this car finished!!!

I soooo cannot wait to see this car finished!!!
"Confucious Say: Man who have dubs in driveway walk out of house in morning with smile, but then move around two dubs to leave." JD3
-
mk2dubber
- In the trunk...

- Posts: 294
- Joined: Oct Sat 18, 2008 11:27 pm
- Vehicles: 06 300c Hemi 2013 Ram 2500 CTD 83 GTi
- Location: Upstate NY
Re: VR6 Caddy Build
This will be a sick sleeper man, seeing as you'll be keeping it all stock appearing.
"It Doesn't Matter, It Has VTEC"
"The #3 rod end cap came off, and was sitting in the pan. The rod was whacking around like a 13 yr old with a Victoria's Secret catalog."
"It takes a few seconds to get to holy-sh!t, but oh-my-god comes up pretty fast."
"The #3 rod end cap came off, and was sitting in the pan. The rod was whacking around like a 13 yr old with a Victoria's Secret catalog."
"It takes a few seconds to get to holy-sh!t, but oh-my-god comes up pretty fast."
-
BigSkyVR6Caddy
- In the engine bay...
- Posts: 105
- Joined: Nov Thu 01, 2007 7:32 pm
- Location: Bozeman, MT
Re: VR6 Caddy Build
I inserted two pictures into my last post showing how I removed the subframe mounts and what they look like now.
It's a little cold and wet out there, but I plan on cutting and grinding on the Caddy as long as the rain holds off.
It's a little cold and wet out there, but I plan on cutting and grinding on the Caddy as long as the rain holds off.
1981 Rabbit Pick-up MKIII VR6
-
Mikewire
- Site Admin

- Posts: 4091
- Joined: Oct Thu 20, 2005 1:23 am
- Vehicles: Air and Water
- Location: San Antonio, TX
- Contact:
Re: VR6 Caddy Build
Wow man that is some serious fabrication. Looks like it's coming along pretty well!
2015 Porsche Macan S
2021 VW Atlas SEL Premium 4-Motion
1972 VW Kombi 9 Passenger Deluxe w/ 2.0L F.I. VWAC
1965 VW Beetle
FAQ | Forum rules
-
BigSkyVR6Caddy
- In the engine bay...
- Posts: 105
- Joined: Nov Thu 01, 2007 7:32 pm
- Location: Bozeman, MT
Re: VR6 Caddy Build
Thanks for everyones interest and encouragement!Wow man that is some serious fabrication. Looks like it's coming along pretty well!
Got a lot of cutting and grinding done today on the Caddy.
Hopefully another big day tomorrow and I should finish off the cutting and grinding.
I have washed quite a bit of metal off the driveway.
Getting to the point where I need to buy a welder.
Brandon and Matt sold me on a 110v wire feed MIG.
Gotta start checking them out and make a purchase.
1981 Rabbit Pick-up MKIII VR6
-
BigSkyVR6Caddy
- In the engine bay...
- Posts: 105
- Joined: Nov Thu 01, 2007 7:32 pm
- Location: Bozeman, MT
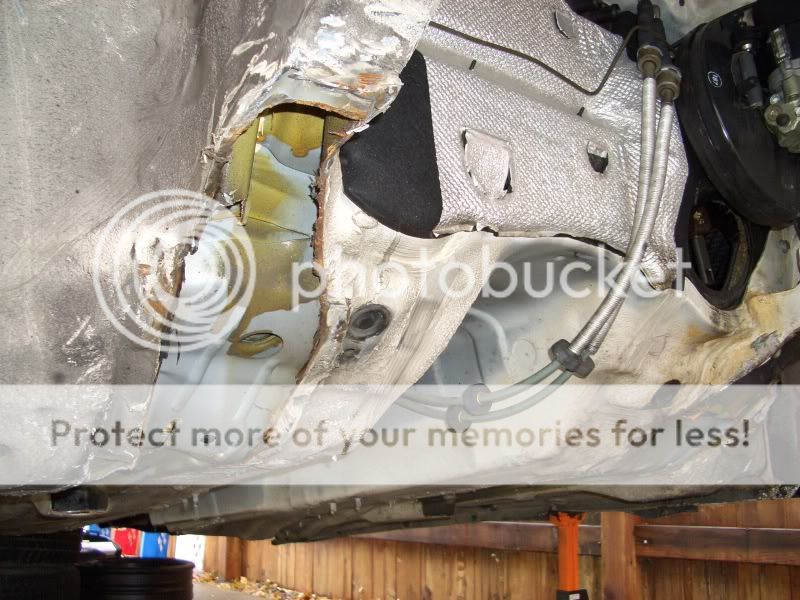
Cut and Grind on Caddy
The major cutting and grinding on the Caddy is complete.
Removed all useless metal from the engine bay: motor mounts, battery tray, etc...

I used a piece of angle iron as a guide to make the critical cuts on the old axle tunnels.
Then I cut everything else off and ground it flush to the firewall.
The front subframe mounting points will bolt to the bottom of these remaining pieces.
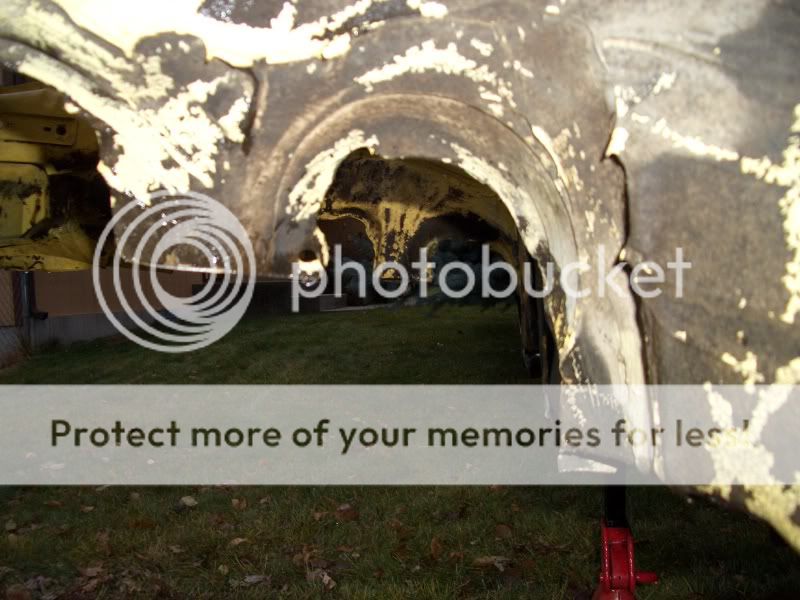
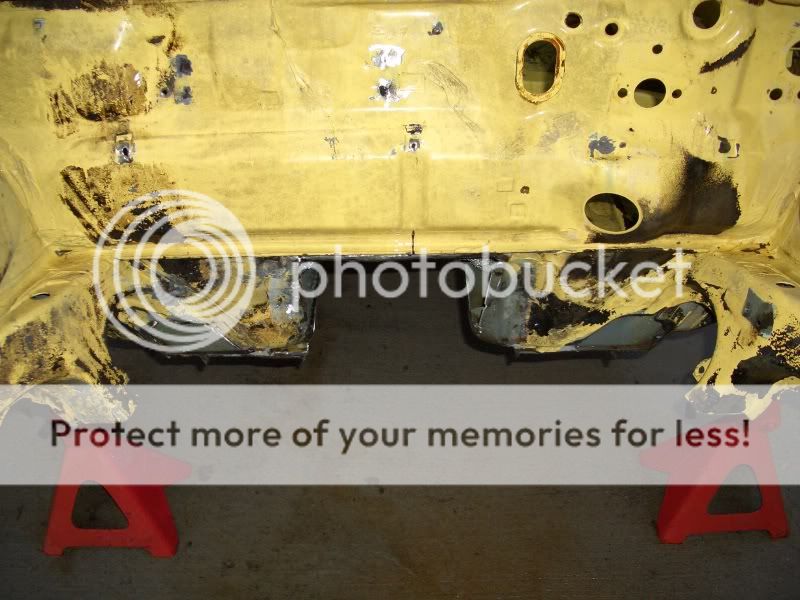
The last thing I took care of today was to make room for the down pipe to clear the underbody.
I did this by removing the outer skin of the tunnel just below the fire wall.

This will add a lot of clearance and help me get that engine as close to the body as possible.
I would like the hood to just clear the engine and I think this will help make that happen.
I will frame and strengthen that area later and add some heat shielding.
The good news is I beat the snow as far as the Caddy is concerned.
It is ready to come inside and sit on the subframe. I will need some help when that time comes.
Got to finish prepping the subframe first.
Removed all useless metal from the engine bay: motor mounts, battery tray, etc...
I used a piece of angle iron as a guide to make the critical cuts on the old axle tunnels.
Then I cut everything else off and ground it flush to the firewall.
The front subframe mounting points will bolt to the bottom of these remaining pieces.
The last thing I took care of today was to make room for the down pipe to clear the underbody.
I did this by removing the outer skin of the tunnel just below the fire wall.
This will add a lot of clearance and help me get that engine as close to the body as possible.
I would like the hood to just clear the engine and I think this will help make that happen.
I will frame and strengthen that area later and add some heat shielding.
The good news is I beat the snow as far as the Caddy is concerned.
It is ready to come inside and sit on the subframe. I will need some help when that time comes.
Got to finish prepping the subframe first.
1981 Rabbit Pick-up MKIII VR6
-
sneakyboy1
- Euro Addict!!!
- Posts: 2344
- Joined: Jan Wed 09, 2008 1:30 am
- Vehicles: 03 B6 A4 3.0 6MT
63 VW Bug
83 GTI
83 CJ7 - Location: Missoula, MT
- Contact:
Re: VR6 Caddy Build
Great progress man! Way to beat the snow too! This thing is going to be sooo sick! 
"Confucious Say: Man who have dubs in driveway walk out of house in morning with smile, but then move around two dubs to leave." JD3
