
BFI: http://store.blackforestindustries.com/index.html
StageI: http://store.blackforestindustries.com/bfist1doin.html
StageII: http://store.blackforestindustries.com/bfist2doin.html
Tools Needed:
- Jack stands
- Floor jack
- 3/8" socket wrench
- 16mm socket
- 14mm socket
- Torque wrench
- Replacement stretch bolts if you are reinstalling the old mount.
- Front mount-to-tranny bolt - N10246603 (need 1)
- Rear mount-to-tranny bolt - N90597001 (need 1)
- Mount-to-subframe bolts - N10268302 (need 2)
- Replacement bushings (inner and outer) if you are reinstalling the old mount. *optional
Remove the splash guard on the front - there are four T20 screws holding it on.

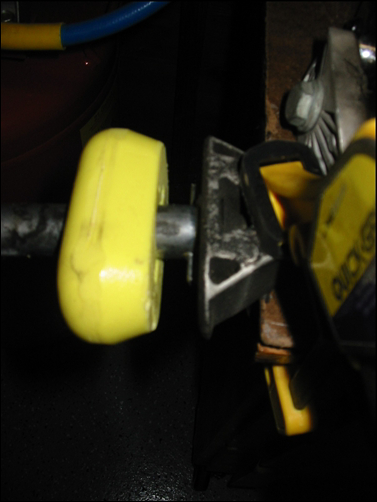
Unbolt the dogbone from the cross member and the transmission - there are two 14mm bolts on the sub frame and two 16mm bolts on the transmission to remove. Once you get those loose the dogbone will be free from the car. Watch for the back of your motor tilting towards the rear of the car - it will be fine to leave it for now, but if it moves too much, or you really want to keep it from moving then you could use your widow maker jack between then oilpan and the subframe (or use VAG tool 3300A).
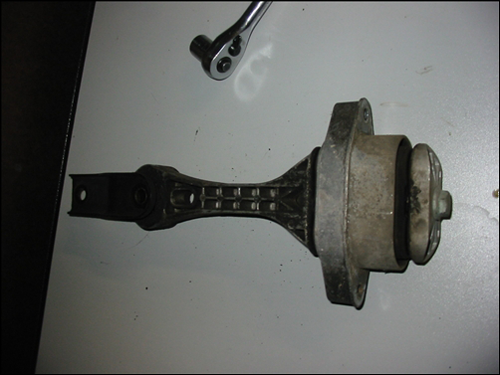
With the dogbone off the car, you need to unbolt the center 16mm bolt holding the bushings in place.
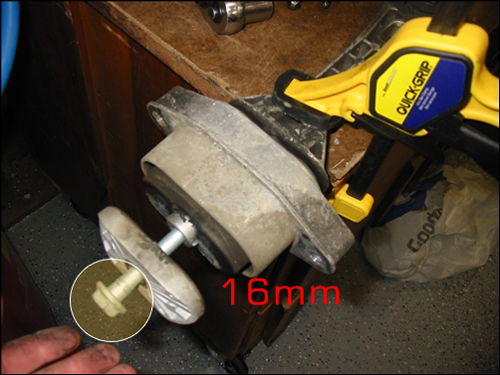
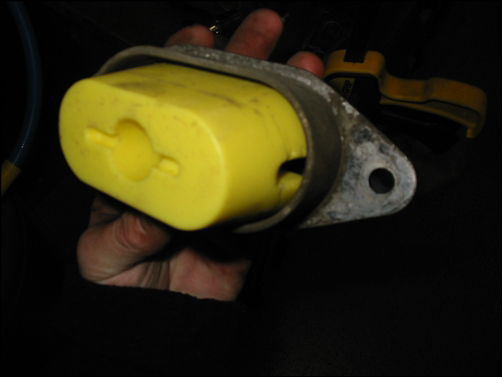
I used a small clamp to hold the dogbone to my workbench - it would have been easier with a vise, but I don't have one yet. Once you get it clamped, unbolt the center bolt. All the pieces will slide off - take them off in order and put them aside. You can leave the compression nut (it slides into the middle area of the mount) in place, but watch because it will drop out and get lost if you are not careful.
I ordered Stage1 dogbone bushings from BFI (Black Forest Industries) which retail for about $25 plus shipping. They are a shore hardness 65a vs. 45-50a for stock. Reassemble the dogbone making sure you get the bushings and spacers back in the correct order.
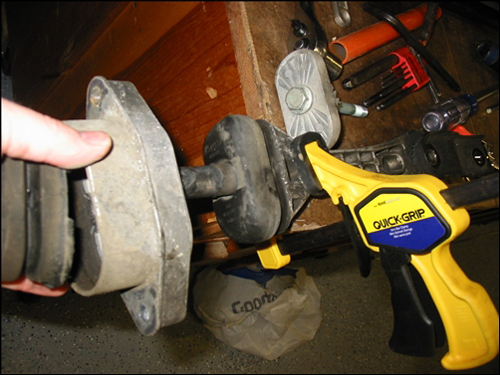
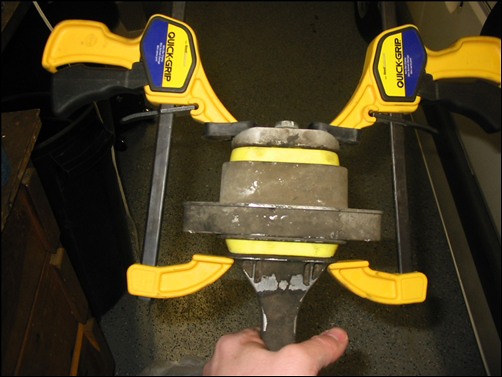
Here is where it gets a little tricky: You need to compress the bushings in order to get the bolt to thread back into the nut inside the dogbone. I used two quick clamps to compress them but I think a vise would work much better and be easier. When you get it compressed enough you can get the bolt threaded into the compression nut a few threads and remove the clamp. From here you need to torque the bolt to the proper spec - 20 Nm (15ft-lbs) + 1/4 turn. I clamped mine back to the bench to get enough torque on it.
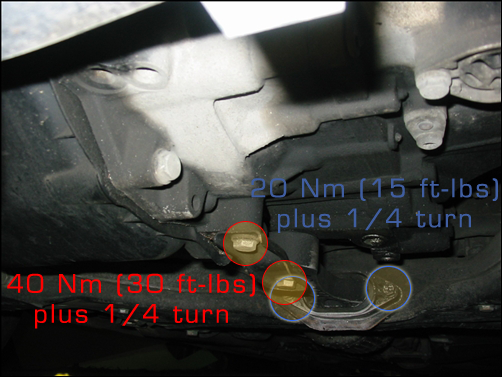
Re-installation is the reverse of removal - Torque the two 13mm bolts that go into the subframe to 20 Nm (15 ft-lbs), plus an additional 1/4 turn. Torque the two 16mm bolts that go into the bottom of the transmission 40 Nm (30 ft-lbs), plus an additional 1/4 turn.
Once the install is complete, fire up the motor. I noticed quite a bit of vibration at idle, but after about a week the vibrations settled down a little bit and now it just feels normal, but much more firm and responsive when I get on the pedal. I noticed the shifting was a little smoother, although I also changed tranny fluid and adjusted my linkage the same night, but shifting was better and I spun the tires pretty nicely with no wheel hop. The clutch grabs a lot better, but now I know it is time to change the clutch.
I recommend - BFI rocks.